If you’re someone who needs that morning caffeine fix, you’ve most likely wondered, “Can I leave water in my coffee maker overnight?” The answer to the question isn’t a simple yes or no because there are a lot of factors to consider. The type of coffee machine can influence the response.
The time you can leave water in a coffee reservoir varies greatly depending on who you ask. Some sources show that water can stay in a machine for up to two days before bacteria will grow. However, in as little as 12 hours, the water will start to taste flat.
If you keep a glass of water on your bedside table, you’ll likely notice that your first sip in the morning doesn’t taste as good as it did when you first poured it. You mirror this situation when you put water in the coffee maker before going to bed, then use it to brew coffee in the morning. The water is safe to drink but won’t taste the best.
Filling Your Coffee Reservoir with Water the Night Before Can be a Timesaver - But it Comes With Some Risk
One upside of leaving water in your coffee maker for 12 hours or longer is that the brewing process heats the water. Some bacteria can live in warm temperatures, but boiling water kills almost everything. Therefore, your coffee maker’s heat will likely kill any bacteria growing in the water before you drink it.
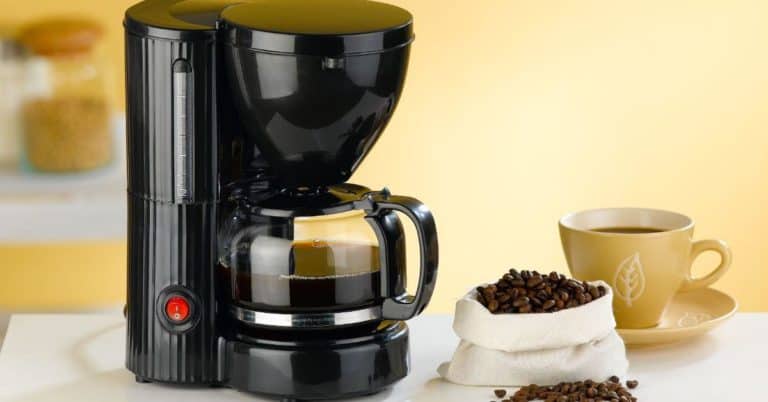
Manufacturers make drip coffee makers with timers, so they ask you to put water in the reservoir in advance. Most coffee makers have reservoirs that hold up to 12 cups of water. You can fill the machine even if you only brew six cups of coffee. If you brew a six-cup pot daily, you’ll empty the tank in two days, and the water should be fine.
People using this approach should clean and descale their drip coffee makers every month. This additional cleaning will help prevent bacterial growth and limescale buildups.
Since Moka pots make such small servings of coffee, it’s not much of a hassle to fill them with water before you begin brewing. It’s always best to use hot water with a Moka pot because it eliminates the metallic taste from the reservoir. Instead of fridge water, use hot water from the faucet for delicious coffee.
There’s no automated aspect to making coffee in a Moka pot, which is almost like a miniature espresso machine. It’s not like you can set it up the night before and wake to hot coffee because you can’t leave your stove on for hours. The Moka pot would overflow, and any remaining coffee would likely taste burnt and bitter.
Brewing with a Moka pot gives you complete control over the brewing process, so there’s no need to add water and let it sit overnight. It’s best to add fresh water right before you add coffee grounds. You’ll then put the Moka pot on the stove burner and let it boil. The coffee tastes best when you drink it immediately, so you won’t have to let water sit.
Keurigs make it easy to brew a single cup of coffee at a time. If you don’t drink a lot of coffee, it’s a preferable option compared to brewing a whole pot and letting the rest of the coffee go to waste. It also ensures you get a fresh cup of coffee each time, instead of drinking the last bitter cup from a pot that’s been on the warmer for hours.
The manufacturer made Keurig water reservoirs large enough that you can store enough water for six to eight cups of coffee. You don’t have to add water to the reservoir before brewing each cup. You can pop in a new K-cup and start the machine, knowing there’s enough water for a fresh mug of coffee.
To ensure your coffee tastes the best, you shouldn’t leave water in your Keurig reservoir for more than 12 hours. Bacteria will grow in moist, dark places, and that’s the environment your Keurig water reservoir provides.
Instead of adding enough water to fill the reservoir, think of how much coffee you will likely drink within the next 12 hours. If you usually have two cups daily, fill a mug twice and dump it into the reservoir. It guarantees you’re getting just enough water for your hot coffee but not leaving any behind to inspire mold growth.
Cold brew pitchers have a straightforward design: a tall plastic pitcher with an extended coffee filter hanging down from the lid. Since you’re not using boiling water to push the coffee grounds through the filter, you must leave the water inside for longer.
Add coffee grounds to the filter, fill the pitcher with water, and store it in the fridge. Most cold brew recipes recommend letting the ground coffee steep in the water for 12 to 18 hours to get the best flavor.
It’s possible to let the coffee brew for 20 hours, but if you get closer to 24 hours, you might notice the taste has gone from powerful to unpleasant. If you want to make iced coffee with a strong flavor, it’s better to use less water in the brewing process instead of letting it sit for a longer time.
It’s worth noting that a pitcher isn’t required to make cold brew coffee. You can add coffee grounds to a jar or a French press and filter out the coffee grounds.
It’s tempting to prepare your coffee each night before you go to bed. That way, you can press the brew button as soon as you wake up and not wait too long for your caffeine fix. Some coffee makers even have programmable settings so your coffee can start brewing before your alarm buzzes.
But if it’s not a good idea to leave water in your coffee reservoir, how can you prepare coffee the night before?
The short answer is you can leave water in your coffee maker overnight. It’s a time-saving technique that ensures you have time for your morning joe without needing to add extra minutes to your routine. But it’s better not to leave water in the coffee reservoir for over 12 hours for many reasons.
The biggest reason is, of course, possible bacterial growth. Drinking contaminated water can make you sick. Also, the longer you leave water in the reservoir, the more limescale will build up. If you frequently leave water in your coffee maker for 12 hours or longer, you must often descale the machine.
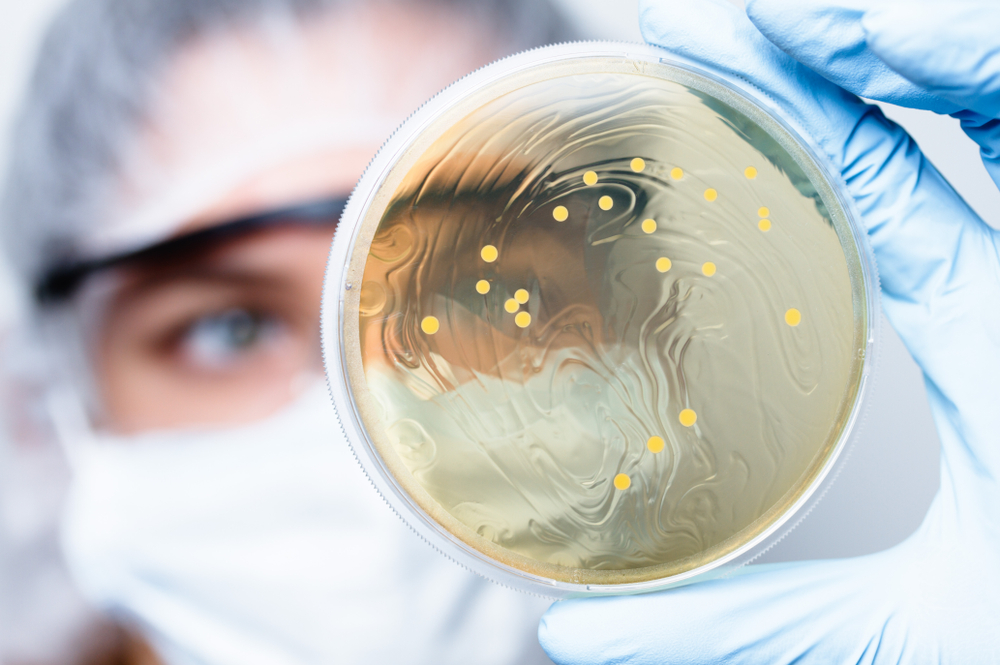
Bacteria is Always a Risk in Standing Water
You want to clean anything that uses water fairly frequently to prevent waterborne germs. Municipalities must legally treat tap water before it makes its way to citizens’ homes, but that doesn’t guarantee a lack of germs. Bacteria can develop when you use this water in your coffee machines and then let it sit.
The best way to clean your coffee maker depends on the style of the machine. Whether you’ve left water in it for too long or just need to descale the interiors, read on to find out the preferred cleaning methods.
Add warm water and white vinegar to the machine’s water reservoir. Ensure your coffee pot is in place because you’ll run a standard brew cycle. The coffee maker will heat the water and vinegar mixture and push it through all the internal systems. You can let the liquid rest for 15 minutes in the carafe to make it easier to remove coffee stains.

Photo of a CoffeeMaker With a Water Reservoir
When you regularly clean your coffee maker, you’ll notice a delicious taste in your brewed coffee. It’s a result of cleaning away the oils that coffee beans leave behind after being brewed. The process also clears out any bacteria and mold that might attempt to grow due to remaining moisture.
You can also clean stains off your glass carafe by adding a small amount of baking soda to water and gently scouring the interior. The baking soda sloughs off the coffee stains without harming the glass.
Cleaning your Moka pot after every use ensures the best tasting coffee with each brew. Wait until it cools before taking apart the pieces. Throw the coffee grounds in the trash or compost and wash and dry the pieces by hand. You can’t put a Moka pot in the dishwasher due to its aluminum body.
Use lemon juice and vinegar to descale your Moka pot every few months. Mix a tablespoon of each into a full water reservoir. Let the liquids sit for about two hours so they can decalcify the interior. Then put the pot on a burner like you’re brewing coffee. The heat sends the liquid up through the machine to clean it.
Always let the Moka pot pieces dry completely before reassembling them. Any moisture on an aluminum Moka pot can lead to rusting.
It’s difficult to clean a Keurig’s water reservoir because there’s no internal drain plug. You can take the water tank apart to give it a thorough cleaning. Find the interior drain pipe and unscrew the bottom panel so you can reach the drain. Remove the hose and let it funnel into a cup or the sink until all remaining water drains out. Then reinstall the hose and continue enjoying coffee.
If you’d rather not struggle with dismantling and reassembling your expensive coffee maker, you can run a deep clean cycle. Let the machine brew with no K-cup inside. The water will boil and push through the internal system, cleansing it. You can do this as many times as necessary to use up all remaining water.
Once you’ve drained the excess water, you can clean the reservoir. Take apart the machine so you can extract the water tank. Depending on your Keurig model, it might be dishwasher-safe. You should be careful with the dishwasher, though, as it can damage different types of pottery and plastic. If you’re unsure, you can handwash the tank with dish detergent or white vinegar.
As with the other coffee machines, it’s best to regularly clean a cold brew pitcher with warm water and vinegar. You can use this combination on both the plastic or glass pitcher as well as the coffee filter.
Clean the filter carefully to prevent rips. You might notice grounds clogging the filter as well. If the coffee grounds block or stain the filter, you can let it soak in a water and vinegar mixture before rinsing.