Everyone who gets a new tile floor has questions about when they can put appliances back on the floor. That question has many different answers and depends on a few factors.
The following is a general guideline regarding when to put appliances and other heavy furniture on new tile flooring and whether you should tile under the appliances.

Modern Tile Floors Bring an Elegant Look to Kitchens
There is no single answer to the question about appliances on tile flooring. There is no single answer because every manufacturer makes every type of file flooring a little bit different. Subsequently, every manufacturer has different recommendations.
Before installing a single new tile, you should check out the manufacturer's recommendations for at least the following:
The manufacturer's advice will cover other topics that you should also note.
Many flooring products come with at least a one-year warranty. That warranty also comes with many stipulations that must be followed to remain applicable.
Make sure you follow the recommendations as closely as you can. Not doing so is reason enough for the manufacturer to negate any warranties. If, for example, you use a different adhesive than is recommended, you could void your warranty. The same applies to damage caused by moving appliances or other heavy items onto the tile too early.
If you are intent on preserving your warranty, what the manufacturer recommends regarding moving appliances on your new tile installation is as far as you need to go. If the warranty is not an issue, you have more leeway, although following the manufacturer's recommendations guarantees your appliances will not harm your new floor.
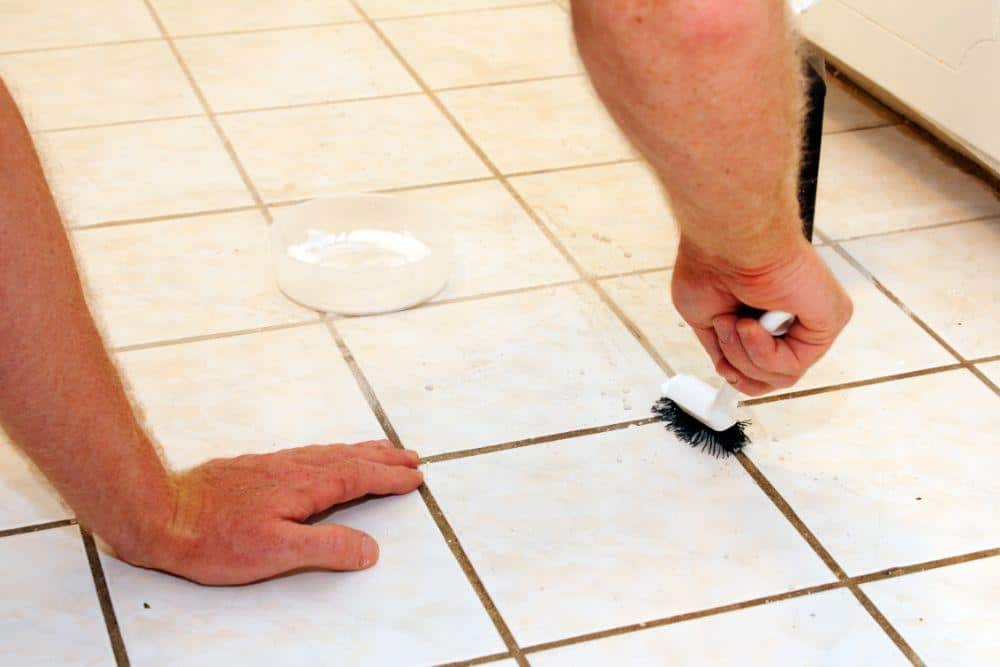
The key to restoring your appliances is the cure time it takes for the adhesive and any grout. If you move your appliances on too soon and the adhesive has not set, you can shift the tiles. The shift might be imperceptible at first, but over time, your border lines will separate, leading to uneven lines across your floor.
Make Sure to Allow Your Tile Floor the Proper Time to Cure Before Placing Appliances
The risk to the grout is that it is not dried entirely and loosens or cracks either by the weight of the appliances or because the floor tiles have shifted. While there is some leeway with the tile adhesive because you cannot see it, grout is visible, so any blemishes the tile creates usually stick out. With that in mind, pay attention to the grout manufacturer's recommendations.
Even if you use grout, as the tile manufacturer recommends, the grout instructions will likely differ. Use the grout instructions for curing over any instructions for the adhesive.
Tile Floor Installation for Beginners
A rule of thumb is to wait at least 48 -72 hours for any tile to move any appliances heavier than 50 pounds across or on them. The time limit applies to all types of tile, mortar, adhesive, and grout.
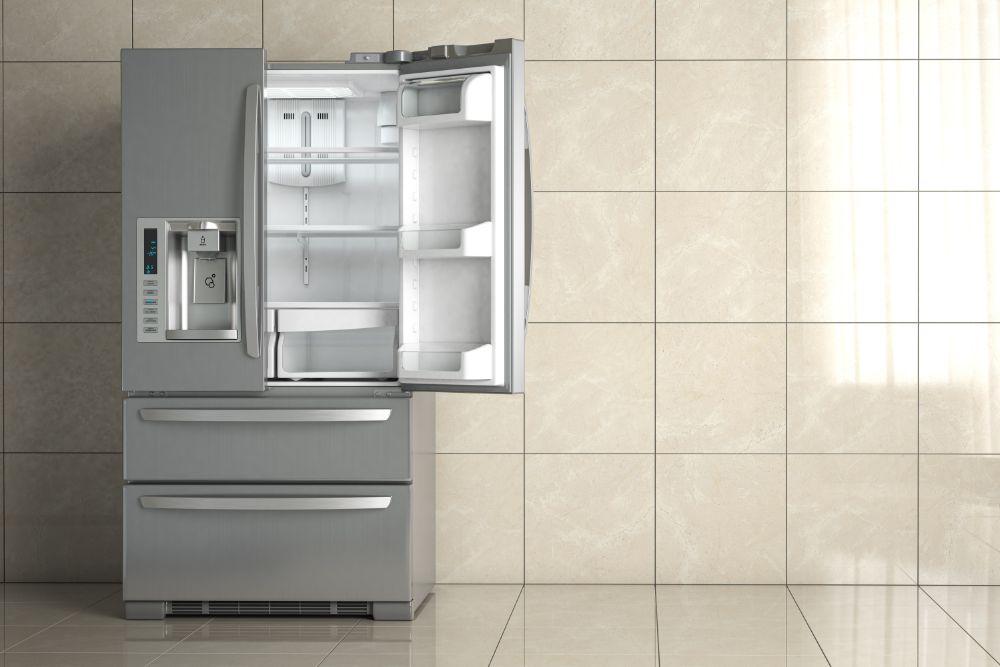
Be Sure to Allow Plenty of Time for Your Kitchen Floor to Cure Before Bringing in Heavy Appliances Like Refrigerators
With hard tiles (like ceramic tile), letting the adhesive or mortar set for 24 hours and then the grout set another 24 hours is standard. To be safe, some installers will recommend waiting another 24 hours beyond that. By waiting that additional 24 hours, you can assume that the adhesive or mortar has cured significantly and the grout has not only cured but hardened.
A few factors can affect how quickly adhesive or grout cure.
First is how much was needed to hold the tiles in place. With some subfloors, the wood seems to absorb the adhesive (mortar much less so) and requires more adhesive to create enough of a base to hold a tile in place.
Another risk is that the adhesive is applied unevenly, leading to pockets of deeper adhesive. The deeper adhesive takes longer to cure. The main reason for this happening is that the subfloor is not even.
A second factor is if the adhesive used could have tile laid on it wet or if it had to be dry but tacky. Laying tile of any sort on an adhesive that is too wet can delay curing time and make the tiles prone to shift. Adding appliance weight to it can lead to significant shifting.
If the adhesive can be wet when the tile is applied, you have few worries beyond the thickness of the adhesive you put on the subfloor. If the adhesive has to be dry but tacky, installing too early can lead to tiles that never cure properly and can shift just by walking on them.
Test your adhesive by putting a finger lightly on the adhesive. If any adhesive comes off on your finger, the adhesive is not dry enough. It is ready for tile if the adhesive is sticky but does not come off your finger.
A third consideration is the humidity present when you lay the tile. In very humid conditions, adhesive takes longer to cure. Plan an additional 24 hours after laying the tile for the adhesive to dry.
When laying tile on top of the tile, follow the manufacturer's recommendations to the letter. At least add 24 hours additional setting time to be safe.
Heavy appliances can directly damage tiles. Follow manufacturer recommendations for the type of appliance and weight you can install onto the floor and not expect damage.
The best buffers you can use are thicker cardboard or quarter-inch plywood. If you can carry your appliances, move the buffer into the space directly in front of where your appliances go, and then move the appliances onto the buffer. Leave yourself enough room to lift the front of the appliances and slide the buffer out once the appliances are in place.
If you do not have a buffer, roll the appliances along the new kitchen tile slowly and carefully.
The answer to this is subjective, but the risk you run by not having your appliances sit on tile is that they will be uneven with the rest of the tiled floor. You can use risers to elevate your appliance to the level of the tiles, but risers can shift, and when they do, you will have to move the appliances out of their place to fix the risers.
If you are careful when replacing the appliances, you can lay vinyl, stone, ceramic tile, or porcelain tiles underneath with little or no risk to the finished product. That includes keeping the tiles safe when kitchen cabinets, appliances, and even a heavy bathroom vanity cabinet are placed on them.
When the tiles can handle foot traffic depends on the type of tile you have installed and your tile installation method. At least, you should wait 24 hours. If possible, keep people off the new tile floor for 72 hours if you used grout. When you walk on the tiles, do not jump on them or put any objects heavier than a few pounds on them until they have healed.
Limiting heavy traffic is also a good idea until you have put the appliances back. Heavy traffic can move tiles and crack grout if it has not fully cured. It is best to adopt a “only if necessary” approach to walking on the floor for at least one night.