Creating holes in plastic is often necessary to allow drainage, ventilation, or simply to insert another object through the hole.
Gardening in containers is a common hobby nowadays and for that you might need to make a few holes to allow for proper water drainage, for example.
While a drill is the most common way to create a hole in the plastic, there are other ways. And that’s what we’re going to show you today.
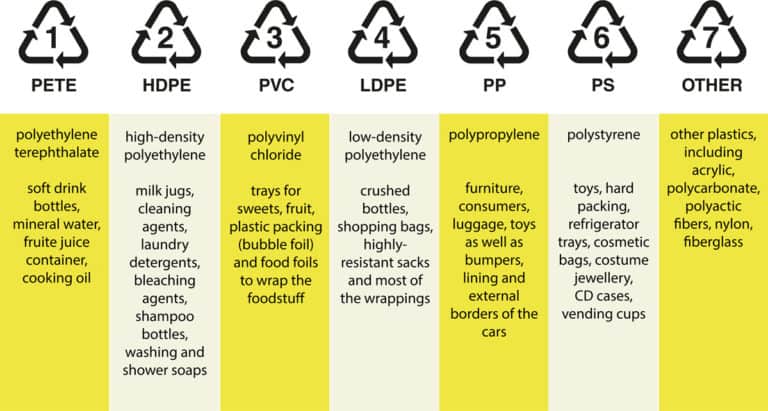
Cutting holes in plastic containers can be done in several ways, depending on the type and thickness of plastic you have. The key is to choose the right cutting tool and to go slow, so you don't crack or break the material. If you're unsure how your plastic will respond to a particular cutting method, it's always best to test on a scrap piece first.
Safety is always the main concern when working with tools, so take all necessary precautions and have a clear work area before starting. Safety issues include using eye protection and being aware of where your fingers are in relation to the cutting tool.
Be sure to take care when cutting or drilling through plastic. A little patience and caution will go a long way in preventing accidents.
For thicker plastic, such as that used for storage containers or cutting boards, you'll need a power drill and a drill bit designed specifically for cutting plastic. You can find these at most hardware stores.
The best drill bit for plastic is a spur point or dowel. These bits have a center point and two cutting spurs that help to keep the bit from slipping. These bits will not leave rough edges. For thicker plastic, you may want to use a more significant drill bit, such as a 1/2-inch or 3/4-inch bit.
You may need a step drill bit if working with hard plastic. This type of bit has multiple cutting surfaces that allow it to quickly drill through more rigid material.
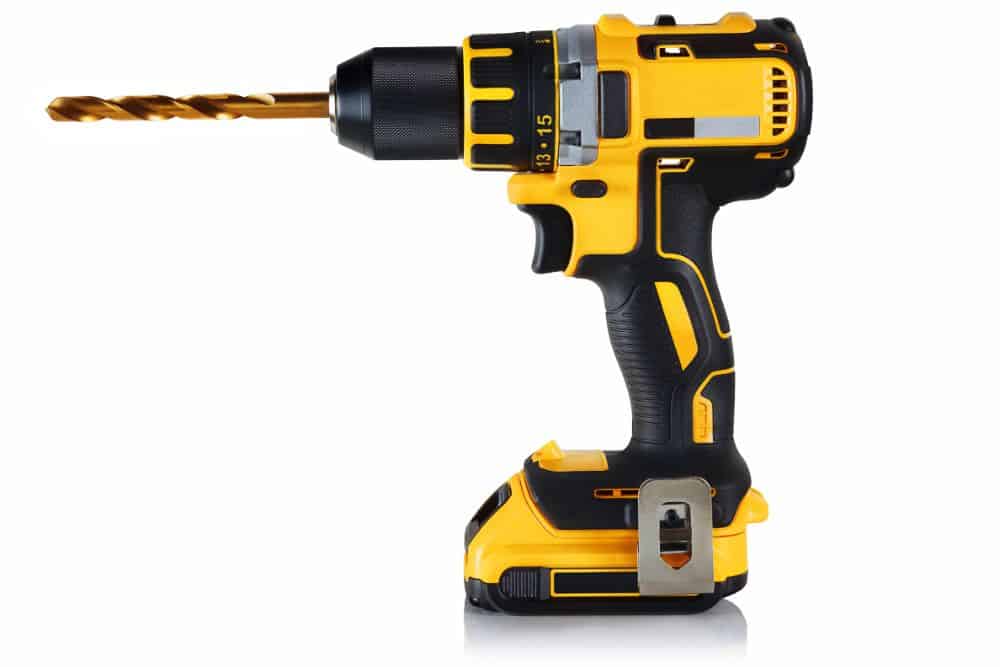
When choosing a drill bit, select one that is the same size or slightly smaller than the hole you want to create. Do not use twist bits, as these are not designed for cutting plastic and can easily slip or break apart.
Use a lubricant while drilling, such as silicone, to help prevent the bit from overheating and melting the plastic. One hundred percent silicone is used to lubricate treadmill tracks, so that's a good way to find it online.
Once you've drilled your hole, use a file or sandpaper to smooth the edges and remove any sharp burrs. This process will help prevent cuts or scrapes when using the container.
When drilling through plastic, it's essential to go slowly and use moderate pressure. The drill bit can slip and damage the plastic if you apply too much pressure.
Countersinking the hole may be necessary to prevent the drill bit from slipping. This process involves using a drill to make an indentation on the plastic. When you drill through the plastic, the bit will not slip as easily. You might also use a countersink bit to make the indentation before drilling. These bits have a cutting edge slightly larger than the main body of the drill bit.
Another way to avoid slippage is to use a pilot hole drill bit. This type of bit has a smaller tip that helps to guide the drill bit and prevent it from slipping.
If you’re drilling a pot, placing a block of wood beneath it will also help to prevent the drill bit from slipping and damaging the plastic. This wood will also support the plastic and prevent cracking.
If you're working with a large piece of plastic, it's best to mark the area where you'll be cutting before drilling. This process will help prevent mistakes. Use a tape measure to locate the middle of the hole and mark it with a pencil. Then, use a compass or template to outline the hole.
Once you've marked the area, drill a small pilot hole to get started. Then, increase the hole size until it's the desired width.
You can use a jigsaw to cut plastic. Make sure the plastic is secured with a clamp before you start cutting. This method works best with thick plastic because a jigsaw's power will crack thinner materials.
Use a sharp, fine-toothed blade designed for cutting plastic. A good rule is to use a blade with 14 - 21 teeth per inch.
A hole saw is another option, though it's more likely to crack the plastic if you're not careful. Go slow and tape the plastic around where you're drilling. Support the plastic with wood for better results.
A hacksaw can also cut plastic, but it will take more time and effort. Use the entire length of the blade. A saw with fine teeth works best.
A reciprocating saw is a power saw that works well for cutting thick plastic. It has a blade that moves up and down, making it easy to cut through the material. A medium tooth count of around ten teeth per inch is best for cutting plastic.
For thin plastic you can simply use a sharp knife or scissors to cut a hole.
If you don't own a drill, an Exacto knife should work to cut through slightly thicker plastic. Be sure to use extra caution and go slowly to avoid cutting yourself.
Another way to cut a hole is to heat a needle or nail with a lighter and poke it through the plastic. You can also make a saw out of a piece of string.
Using a cold knife can lead to slipping and cracking. Melting does not have these issues, but you must ensure the hole is even and sand the edges.
You can use a utility knife to score the plastic if you don't have a saw. This method works best with thin plastic. You may need to make several cuts with the knife to cut through the material thoroughly.
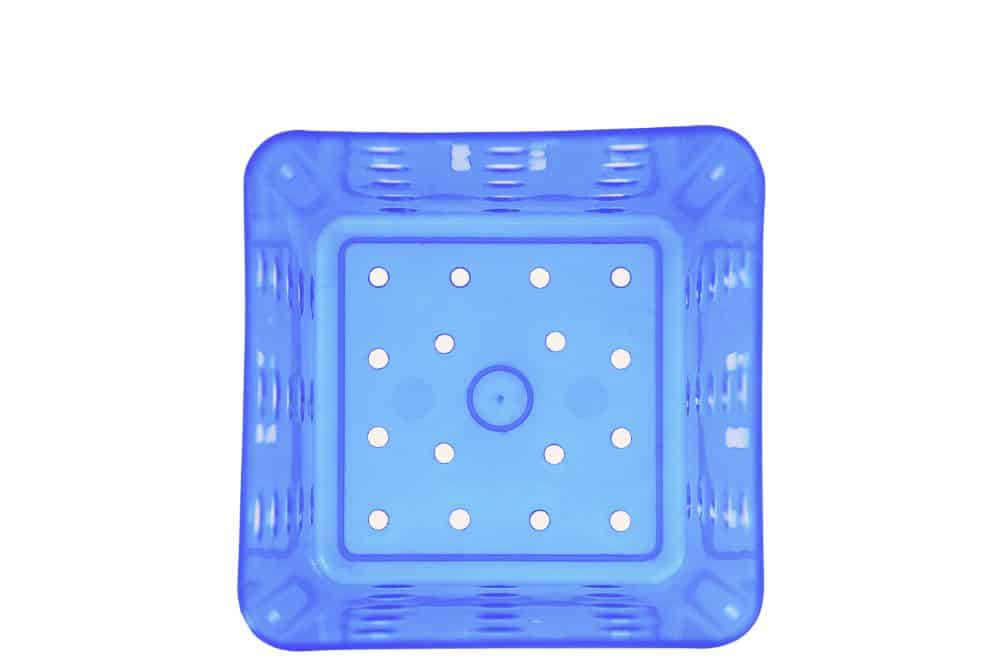
Drill a hole for drainage in plastic pots is vital to ensure that your soil doesn't become waterlogged. The easiest way to create these holes is to use a drill with a spur-point bit.
Placing plywood beneath the planters will help to prevent the drill bit from slipping and damaging the plastic. This wood will also support the plastic and prevent cracking.
Start by drilling a small hole in the bottom of the flower pot. Then, working your way around the pot, drill additional holes about 2 inches apart.
A rotary tool with a cutting bit can also create drainage holes in plastic pots. Just be sure to go slowly and apply gentle pressure.